25 AnoS Online
online dedicados aos amantes do bonsai no Brasil e no Mundo.
O tempo não faz de você um bonsaísta, é o seu interior que é ou não.
Árvore centenária repousa no tokonoma
Enquanto repouso em ti.
Vou deixando-me ficar
Aprendendo a secular Arte.
Mário A. G. Leal

Você esta aqui: Home > O Bonsai 1 > Bonsai Dentro de Casa
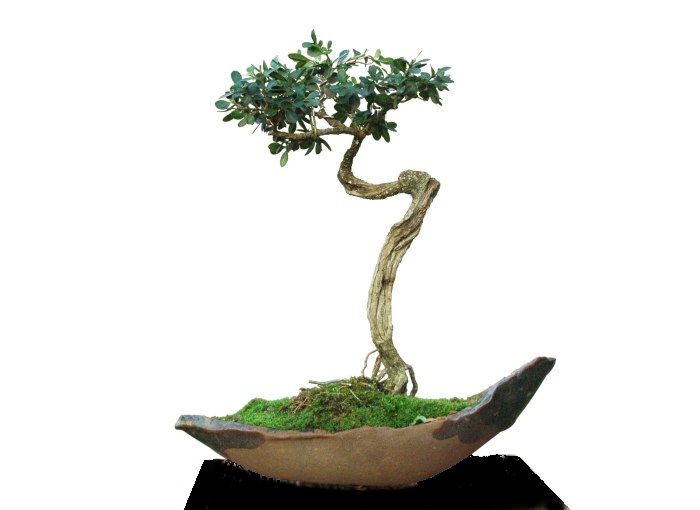
Bonsai dentro de casa

Quando visitei Gilbert Edelstein em New York, 1998, vi pela primeira vez bonsai sob luz fluorescente. Gilbert informou que tinha plantas que já estavam ali por 7 anos

É interessante observar como a copa das árvores estão próximas das lâmpadas

O estúdio do Gilbert fica no 4.o andar em um edifício comercial.

Alguns trechos desta matéria foram propositadamente omitidos por termos o assunto em outros artigos na página.
Qualquer ajuda para melhorar a tradução será bem vinda. Veja o original e logo abaixo a tradução:
HOW I'VE BEEN GROWING BONSAI INDOORS UNDER
FLOURESCENT LIGHT *
Twenty five years ago, when my first experiments with growing little trees under fluorescent light began, I had one distinct advantage over today's bonsai beginners. At the time, I hadn't read a lot of books and articles making the whole project sound almost impossible.
I hadn't been told you have to mist the foliage regularly. I hadn't been told I'd need a humidifier or cool mist vaporizer. I hadn't been told you have to run a fan to circulate air. I hadn't been told cheap, cool white, fluorescent tubes need to be supplemented with incandescent bulbs. And, I hadn't been told most plants grown indoors still need a cold rest period with temperatures below 50°F. for several weeks each year.
READ THIS CAREFULLY! I am not following today and have not followed any of the procedures listed above. This is not to say some of those practices might not have helped my indoor bonsai grow faster, flower more or look healthier. I don't know. Not being able to offer broader experience, I can only record what has worked "well enough" for me.
When I began hearing then reading that one could grow plants adequately well indoors without special or expensive "grow lights," my winters for ten years had been spent dreaming about bonsai I would grow outdoors come spring and I had a shelf cluttered with attractive little bonsai pots, pots too small to keep anything alive in outdoors with only the once a day attention I was willing to give.
AHA! This might be a way to use those tiny pots and grow bonsai --- and grow as a bonsai enthusiast --- year around. Two small rooted cuttings of pyracantha were brought in from outdoors. The "shop light" was dropped down over my workbench next to the furnace. And the experiment, the indoor fun that continues today, began.
It soon became apparent that fluorescent light bonsai growing offers a number of advantages. It is a very controlled situation with no weather extremes. Trees grow year around so one can practice and make bonsai progress year around. It is great winter therapy available even when it's cold and dark outside. It is good use for those irresistible little pots one tends to accumulate. And, it makes possible growing a surprising number of small bonsai close at hand in a very limited space.
Suppose you are compelled to try fluorescent light bonsai too. What do you need to know? What will you need to do? Actually, a tree's basic requirements are few. Provide light, water, fertilizer, suitable growing medium and protection from extremely hot or extremely cold temperatures and success is highly likely if not guaranteed. Of course, starting with healthy plant material tolerant of indoor growing conditions will be a big boost for your growing project too. Let's discuss each of these issues in turn. LIGHT. Usually, the first question that arises is "do I have to use fluorescent light?" "Can't I grow my indoor trees near a window?" Well, yes. Most kinds of plants people grow as indoor bonsai can, if rotated regularly, be grown successfully using only the light from a nearby window. If African violets or other house plants grown for their flowers --- rather than foliage plants which are, generally, more dark tolerant --- survive near your window, growing indoor bonsai in the same location should be no problem. You can find out what you can do in window light by experimenting. Plants commonly recommended for indoor bonsai will survive well enough. Common plants are common because they are tolerant; they take abuse.
Although some adjustment must take place when trees come in and go out, moving these window bonsai outdoors --- if you want to do that --- during the warm months will strengthen them and increase growth.
Having said you can grow bonsai in window light, I still feel you make it easier for yourself and your indoor trees --- especially if window space is limited --- if you substitute even the most economical kind of fluorescent lighting for window light. The major advantage here is that light availability is very consistent without fluctuations due to extremes of sun and cloudiness; temperatures are more even also.
What you can do is simple enough. A standard four foot, two tube, 40 watt fluorescent unit --- we are talking about the shop light with reflector costing less than $20 at the local discount store --- is suspended or supported from below in such a way that the tubes are very close to --- almost touching --- the tops of your tallest bonsai. The tubes are cool white, cheaper than most others.
You can't picture this? Imagine two, three-gallon size, plastic, nursery containers upside down on a table, their centers about four feet apart, and the ends of the shop light reflector resting on these containers. You can build supports requiring less space but I've used this nursery pot setup repeatedly when I needed quick extra lighting. Keeping your bonsai close to the tubes is important because the light energy available to plants drops off dramatically moving away from the source. The mistake beginners most often make is not keeping fluorescent light bonsai close enough to the tubes. Although I have fluorescent units mounted at different heights, most are not more than nine inches above the surfaces on which my little bonsai sit.
When I began experimenting with fluorescent light bonsai, I read some U.S. Department of Agriculture publications suggesting 14 to 16 hours of fluorescent light daily is adequate for growing plants indoors. So I thought why not try 16 hours as a compromise. This has worked quite well. I have experimented with longer light periods, but keep coming back to 16 hours.
An economical timer is handy to avoid having to remember to turn your lights on and off. The kind of device some people use to control a light and make their home look lived in when they are away will work.
The publications I read also suggested replacing fluorescent tubes used for growing plants annually if they are on 16 hours a day. The reason for this is that light output diminishes gradually over time. Since light intensity will be increased significantly by fresh tubes, it is best to change one of the tubes in a two-tube unit one day then wait a day or two before changing the second tube to avoid damage to delicate growing tips. This is what I've done.
WATER. My practice has been to check each tree daily --- nothing more than once a day --- to see if it needs water. Those that are dry or becoming dry on the soil surface are watered. Those that are not dry will usually be healthier if they wait another day. Avoid keeping your soil constantly full of water. Not being in strong sun or wind slows the drying of these little trees dramatically compared with the same size pot outdoors. Even so, some species dry much more rapidly than others, Experience will soon tell you which ones get extremely dry --- even to the point of wilting --- in a day if not watered at the first hint of surface drying. At the other extreme are those kinds that dry the soil very slowly and will go several days before the soil mix begins to look dry at all.
Incidentally, a sudden reduction in water use, a sudden slowing of soil drying, by any tree is a warning that it is struggling and this is a time to be very careful in watering. Make sure you let the soil of a weak tree dry between waterings but do not let it stand dry.
Watering of my first few experimental fluorescent light bonsai was done with a spray bottle like some people use in applying cleaner when washing windows. Each tiny tree and its soil were misted thoroughly until water ran through the drain hole. As the indoor bonsai collection grew in number, this process became unacceptably time consuming and my hand got tired. I then found I could water more efficiently using a small watering pitcher with a fine spout.
Unfortunately, the pitcher that functioned well was metal and eventually rusted out. The plastic replacement widely available, about one and a half quart capacity, didn't work nearly as well because its spout had a much larger opening and the heavier water stream tended to wash soil mix out of little pots. After struggling with this for longer than one likes to admit, the thought occurred that it might be possible to alter this spout to limit the water flow. Ultimately, a small, four-hole, shirt button was secured to the tip of the spout with epoxy. This has worked very well; enough water flow and not too much.
While watering with the mister and later the succession of pitchers, I always held my little trees over an open container to catch the drainage water. One evening when watering more hurriedly than usual I was suddenly inspired to immerse the pot of the tree being watered in the drainage water in an effort to accelerate the process. A few bubbles rose to the surface and as I lifted the tree from the water, I understood immediately that this watering was more thorough and much quicker than what I had been doing with mister and pitchers.
From that day on I began watering all my indoor bonsai by immersing the soil. This went along well for a while, then an accumulation of whitish material began to appear on the soil and the moss of some trees was beginning to die. Thinking about this a bit, I concluded that minerals (salts) the trees couldn't use were probably beginning to accumulate since they were not being leached, or flushed away by running water through the soil. And, if I didn't begin leaching again my trees might suffer.
Rather than discontinue watering by dipping, what I began doing was to dip then follow up with a very weak fertilizer solution applied with the modified watering pitcher thus leaching and fertilizing at the same time. This is what I still do. This fertilizing process will be described in more detail below. It seems important to note here that although I've gotten by using our town's very hard, well water on my outdoor bonsai, I use soft water indoors. This is not water that has been treated by a water softener. In the past, during the humid months, we have run a dehumidifier in our basement. The mineral free water it collected was used in watering the indoor bonsai. More recently, I’ve found that water discharged from our new central heating and air-cooling equipment works fine too. When water released by combustion and air conditioning processes runs low, rainwater caught in a large trash container set under the eaves is carried to the basement to water the indoor bonsai. Snow also has been brought in occasionally and the melt water used.
This is not to suggest that you can't get by watering indoors with hard water. I am convinced you can. It's just more difficult and regular leaching becomes more important.
Note: To water freshly potted trees without washing all the soil mix away, a basting syringe or similar bulb syringe works very well until enough roots have grown to secure the soil mix when dipping. FERTILIZER. Of course trees do not rely on fertilizers, so-called "plant foods," as energy sources. Their energy, held in the tree as carbohydrate, comes directly from the sun. Typically soil, decomposing organic matter and fertilizer are the sources for plants of some 20 mineral elements (nutrient elements) now considered essential to their health. Use of soil-less mixes to grow our bonsai makes regular fertilizer application essential.
My indoor fertilizing practice has been intentionally kept simple. I have used commercial fertilizers such as Miracid, Miraclegro, Peters 20-20-20 or Rapid-gro in very dilute solution applied almost every watering year around. When in a big hurry, an application may be skipped. This fertilizer solution is made up five gallons at a time by adding one level teaspoon of fertilizer to five gallons of water; so the concentration is one-fifth teaspoon per gallon.
After watering well, some of this weak fertilizer solution is run through the soil. So, as stated earlier, this process leaches and fertilizes at the same time. One caution. Experience shows that even this weak solution can do a lot of damage to some trees when applied on dry soil. Make sure you water first then apply the fertilizer. However, fertilizing with this weak solution can be done immediately after watering without damage.
I do not fertilize newly potted or repotted trees until they begin to produce new foliage. I also withhold fertilizer from sick trees since it seems to do more harm than good.
GROWING MEDIUM. Most people who persist as bonsai growers agree that choice of soil mix, "growing medium" if you prefer, is very important. But then confusion arises. Beyond the general principles that wonderful garden soil is inadequate in a pot and high porosity coupled with good moisture retention are desirable, we don't agree on what to do.
A bonsai growing doctor tells me that in medicine when many different remedies are being used in treating a problem you can be sure none of them work well. Makes one think.
This is certainly not the last word on soil mix. It is merely a statement of what I've been doing. Actually, this is going to sound suspiciously like the old story of the college professor who confided to a colleague that he'd used the same test questions without change for thirty years. His astounded friend was compelled to ask, "Didn't your students catch on?" The professor's response was, "No, I just changed the answers."
The mix I used longest and felt very comfortable with was one part, by volume, starter chicken grit (small particles of granite) available at stores dealing in livestock feed, two parts sphagnum peat (not sphagnum moss) available in bales at our local garden centers and three parts baked clay. Baked clay? Early in my experiments, the baked clay was clay cat litter. I soon discovered clay cat litter can be quite variable and that it was necessary to put a handful of the material in a jar of water and shake it up to see if the particles disintegrated before using it in my soil mix. What I wanted were stable particles that did not turn into mud when wetted.
I have also used with success several of the baked clay products sold for scattering on floors to soak up oil and grease where automobiles are repaired. Again, these products are somewhat variable and it is good to shake a sample in water before incorporating the material in one’s soil mix.
Although more expensive, the baked clay I use now is the product Turface used in constructing golf greens and athletic fields. I have not had a problem with Turface particles disintegrating. I buy the particle size now labeled "MVP" and screen this over an eight-mesh screen (eight openings per inch). Material retained on the screen goes into a coarser mix used for large trees outdoors and for a drainage layer in a few of my bigger indoor bonsai containers. Turface passing through the eight-mesh screen and retained on window screen (sixteen-mesh) is what I use in my "regular" 1-2-3 indoor mix. Even though the starter chicken grit particles are mostly a good size, screening them over window screen eliminates some dust.
The sphagnum peat is whisk-broomed through a four-mesh screen to break up clumps and remove larger chunks of debris. Then it is shaken through a five-mesh screen to separate the useful material into two sizes. Larger peat particles passing the four-mesh and retained on the five-mesh screen are used --- with the larger Turface --- in my coarse mix. It is peat that passes the five-mesh screen then is retained on a sixteen-mesh screen, used to remove fines and dust, that goes into regular, 1-2-3, indoor mix.
After screening, the three ingredients --- grit, peat, and clay in 1-2-3 proportions --- are then blended until the mix looks uniform. Too much mixing just generates more dust. In recent years, tiring of screening peat and feeling that a faster drying mix might be superior to the 1-2-3 ratio, I have experimented with a I grit, I peat, 3 clay mix and been very happy with it. At one time, I experimented with a peatless mix of I part grit: 3 parts baked clay then gave it up because it dried too quickly. Most recently, I have begun trial use of a mix of I grit, 1 peat, and 4 parts clay. It is still too early to say how this is working out.
No matter what ingredients one chooses, screening them over sixteen-mesh screen to eliminate fine particles and dust, thus opening up the spaces between the larger particles, should always be beneficial.
If you are wondering how different in water retention and aeration after watering your soil mix is from my 1-2-3 mix, there is a quick way to make some comparisons. All you will need are a measuring cup of water and an eight-ounce foam cup completely full of your dry soil mix. From the measuring cup, add water slowly to your soil mix until you have filled all the space between and within the particles. Note the amount of water used. Compare this figure with water amounts ranging from 4.25 to 4.75 ounces required to fill the space in the same quantity of my 1-2-3 mix.
Now, holding the foam cup --- full of water and soil mix --- over the measuring cup, slash the bottom edge in several places so water can drain freely. Note the amount of drainage collected. Compare this number with 0.85 to 1.24 ounces of drainage from my mix.
Not being able to add at least 4 ounces of water to 8 ounces of soil is reason to be skeptical. Drainage amounts much less than 0.75 or much more than 1.25 ounces are also questionable. TEMPERATURES. I am often asked what temperature I maintain in the basement where I grow my indoor bonsai. Actually, this temperature changes slowly in response to outdoor temperatures. In periods of extended warm weather, it has risen as high as 84°F. Extended cold results in a chilly basement with temperatures in the 64°F to 66°F range. I have not been particularly conscious of growing problems at either temperature extreme. However, repotting warm climate plants during the warm season does seem to work better than repotting during cold months.
KINDS OF TREES, Theoretically any tree, shrub or vine that doesn't require a cold, dormant period to thrive is a possibility. I have personally experimented with plants from more than three dozen genera growing them as bonsai indoors year around with no outdoor vacations. In doing this, it was soon apparent that some are easier to keep healthy than others. Generally the easier ones are those mentioned most often as indoor material in bonsai books and magazines.
Some personal favorites, kinds I have found very rewarding, are dwarf forms of boxwood (Buxus spp.); small-leaved kinds of cotoneaster (Cotoneaster spp.); figs (Ficus spp.), especially creeping fig (Ficus pumila); Greek myrtle (Myrtus communis), especially the dwarf form (Myrtus communis 'Compacta'); firethorns (Pyracantha spp.), especially the dwarf variety 'Teton’; azaleas (Rhododendron spp.), especially 'Hino Crimson’; Chinese sweetplums (Sageretia theezans); and serissas (Serissa spp.), especially some of the snow-rose clones.
Also, do not ignore small-leaved clones of English ivy (Hedera helix) They are exceedingly difficult to kill, cuttings are guaranteed to root and nice trunks develop much more quickly than most people expect. Now, how about needle evergreens as fluorescent light bonsai? I have heard again and again that junipers (Juniperus spp.) cannot be grown indoors for any length of time. I know that even if I swear here that my two oldest indoor junipers have grown inside under cool white fluorescent light for 21 and 19 years respectively with no outdoor vacations, there will be those who read this and continue to assure their friends that it cannot be done. Admittedly juniper growth is slow under fluorescent light, but they survive and are healthy.
I am convinced that most people, trying to be nice to their trees, over water junipers indoors. Let the soil surface of the established juniper get definitely dry between waterings. Incidentally, boxwoods, cotoneasters and serissas respond well to this treatment too; most azaleas also in my experience. Other needle evergreens that have done well for me indoors under fluorescent light are true cypresses (Cupressus spp.), false cypresses (Chamaecyparis spp.), and surprisingly, little gem Norway spruce (Picea abies 'Little Gem').
Now, some kinds tried indoors which lived for a while but gradually declined, seeming to need a cold dormant period and/or changing day length, must be noted here too. They are pines (Pinus spp.), maples (Acer spp.), quince (Chaenomeles spp.) and spirea (Spiraea spp.).
I suggest that you make an effort to get some of the kinds of trees I've especially enjoyed, but be adventurous and experiment too. The more species you try, the more fun you will have, and ultimately you will have more bonsai too.
OTHER ISSUES. We need to talk about clear "plastic," actually polyethylene, bags. Caution! Do not put a plant enclosed in a poly bag in direct sun. It can get very hot, what scientists call the greenhouse effect. However, the same poly bag --- I use Baggies purchased at the local supermarket --- can be very useful to the fluorescent light horticulturist because this light doesn't cause the extreme heating inside the bag that sunlight does.
My understanding is that there are microscopic pores in these bags, pores small enough to prevent water molecules from escaping yet large enough to allow oxygen and carbon dioxide exchange between air inside and outside the bag. A bonsai enclosed in one of these bags cannot dry out. The humidity inside is 100 percent. After watering thoroughly, I enclose any newly potted or repotted tree in a poly bag. The bag is dropped over the tree and its pot then folded underneath the pot so the bonsai is completely enclosed. This gives the disturbed tree time to make internal adjustments in a relatively stress free environment.
I usually leave the tree bagged under the fluorescent light about a week, not much longer. Swelling buds and new growth are signals that it is time for the tree to come out. This abrupt change from extremely moist to drier air can be quite a shock to a weak plant. What I do to ease the transition --- I call it programmed re-entry --- is to remove the poly bag for just half an hour the first day I take it off. In the case of an unusually sensitive or weak tree, this first outing may be only 15 minutes. Then next day the bag is taken off twice as long. The next day the out time is doubled again. This doubling each day continues until the tree is out for eight hours. When the tree comes out the next day, it stays out, usually without curling a leaf.
The same technique can be used during vacations. Before I accumulated too many indoor bonsai for it to be practical, I watered my trees well, bagged them and left them under the fluorescent lights for as long as two weeks without problems. Well, some trees did die when I pulled the bags off before I realized it was necessary to go through the programmed re-entry again.
How often do I repot my indoor bonsai? I've let some trees go as long as six years between repottings and some of them died. My goal now is to repot on a two or, at the most, three-year cycle because it seems less stress on the bonsai.
Dean Bull's "The Capillary Siphon" article --- BCI Magazine, Vol. 31, No. 57, Sep-Oct 1992 --- opened my eyes. His suggestion was to use cord from a rayon mop head as a drainage wick, Somehow, Dean's idea had not occurred to me. This certainly would be simpler and probably more effective than techniques I'd tried in an effort to pull water from wet-standing pots to save weak and dying bonsai. The first cord mop head I found was cotton and not nearly as active in wicking as I expected. So I went back for a rayon mop head and did find its strings wick much better.
Using curved tweezers, I push about 3/4 inch or so of mop string, depending on pot size, through the waterlogged pot's drain hole and past the screen covering the drain hole so the string's end lies in that very wet zone where soil mix rests on the pot floor. The rest of the foot or two of cord runs to the table edge and hangs over, Water from the saturated layer runs down the wick quickly. This leaves the soil above moist but with much more of its pore space air-filled so the tree's roots are not suffocating for lack of oxygen.
This is in contrast to the sick tree standing abnormally long in water-logged soil because being weak it is not using much water, and because roots need oxygen to be efficient in taking up water even though it is all around them. Remember that soil physicists tell us oxygen diffuses 10,000 times faster through air than through water! Better set a container beneath the dangling string if you don't want a puddle there. I call these mop strings "bonsai life savers." I am sure they saved the lives of several weak trees for me.
If you are a beginner and have read this far without being too intimidated, finish this article and go get yourself some plants --- more than a few --- that you don't have too much invested in monetarily and emotionally, then start your own experiment to find out what it takes for you to keep them alive. Oh yes. If you really want to grow bonsai under fluorescent light or any other way, don't give up too easily! ________________________________________________________________ * This text is an update of Jack’s "Growing Fluorescent Light Bonsai as Winter Therapy" article published in: International Bonsai, Issue No. 4, 1996; and in Bonsai [British], Issue No. 34, Summer, 1997. Additional © Jack Wikle & Fuku-Bonsai Inc., 1992
COMENTÁRIO
COMO TENHO DESENVOLVIDO BONSAI DENTRO DE CASA SOB
LUZ FLUORESCENTE
Vinte cinco anos atrás, quando minha primeira experiência em cultivar bonsai debaixo de luz fluorescente começou, eu tive uma vantagem distinta com relação aos novatos na Arte Bonsai de hoje. Na ocasião, eu não tinha lido muitos livros e artigos que faziam com que o projeto inteiro soasse quase impossível.
Ninguém me disse que tinha que vaporizar as folhagen regularmente. Ninguém me disse que eu tinha que ter um umidificador ou vaporizador. Ninguém me disse que eu precisaria de um circulador de ar. Ninguém me disse que precisaria de luz fluorescente branca complementadas com bulbos incandescentes. E, eu não tinha sido avisado que a maioria das plantas desenvolvidas em lugar fechado ainda precisam de um período frio com temperaturas abaixo de 50°F. durante várias semanas cada ano.
LEIA ISTO CUIDADOSAMENTE!
Eu não estou seguindo hoje e não segui quaisquer dos procedimentos listado acima. Isto não quer dizer que algumas dessas práticas, se eu as tivesse usado, poderiam ter ajudado meus bonsai dentro de casa crescerem mais rapidamente, florescer e parecerem mais saudáveis. Eu não sei. Não posso oferecer experiência maior, posso registrar o que resultou " bom o bastante " para mim do meu trabalho.
Quando eu comecei a ouvir e então ler que poderia cultivar plantas adequadamente, em lugar fechado, sem lâmpadas caras ou especiais, por dez anos, no inverno, sonhava com os bonsai que teria do lado de fora na primavera pois tinha uma estante atravancada com pequenos e atraentes vasos de bonsai, vasos muito pequenos para que se mantivessem vivos com a atenção que eu poderia dispensar. Uma vez ao dia!
AHA! Este poderia ser um modo para usar esses vasos minúsculos e cultivar bonsai, e crescer como bonsaísta, todo ano. Duas estacas de raízes de pequenas piracantas foram trazidos de fora. A luz fluorescente foi colocada em cima de minha bancada próximo a um forno. E a experiência, a diversão em recinto fechado que continua até hoje, começou.
Ficou visível que a lâmpada fluorescente oferecia diversas vantagens. É uma situação muito controlada sem os extremos de tempo. Árvores cultivadas desta maneira podem fazer um bonsai desenvolver-se durante todo ano. É até mesmo uma grande terapia de inverno quando o frio e escuro da estação não nos permite estar fora de casa. É um bom uso para os pequenos vasos de bonsai que costumamos acumular. E, faz possível o desenvolvimento de um número surpreendente de pequenos bonsai próximos à mão em um espaço muito limitado.
Suponha você seja compelido a tentar fazer bonsai sob luz fluorescente também. O que você precisa saber? O que precisará fazer? De fato, as exigências básicas de uma árvore são poucas. Proveja luz, água, fertilizante e proteção de temperaturas extremamente quentes ou extremamente frias que poderá ver o seu desenvolvimento; o sucesso é altamente provável se não garantido. Claro que, começando com materiais saudáveis e, de preferência que tolerem as condições de recinto fechado serão um grande aumento para seu projeto de crescimento. Discutamos cada variante destes assuntos.
LUZ
. Normalmente, a primeira pergunta que surge é: Tenho que usar luz fluorescente? Não posso cultivar minhas árvores em recinto fechado perto de uma janela? Pode!. A maioria das das pessoas que desenvolve bonsai dentro de casa costumam cultivá-los próximo a uma janela. Se violetas africanas ou outras plantas para as flores, assim como folhagens, plantas que são, geralmente, de coloração verde escuro e mais tolerante, sobrevivem próximo a sua janela, podemos concluir que bonsai no mesmo recinto fechado não deveriam ter nenhum problema.
Você descobrirá o que você pode fazer com a iluminação da janela experimentando. Plantas comumente recomendado para bonsai em recinto fechado sobreviverão bem. Plantas comuns são comuns porque são tolerantes; elas aceitam mais.
Embora algum ajustes sejam necessários quando as árvores entram e saem, quando queremos movê-las para o ar livre para aproveitar os meses quentes que as fortalecerão e ajudarão no crescimento. Tendo dito que você pode cultivar bonsai a luz de janela, eu ainda sinto que você fará isto mais fácil para você e suas árvores em recinto fechado, especialmente se o espaço da janela está limitado, e se você pode substituir pelo tipo mais econômico de iluminação fluorescente até mesmo para a luz da janela. A vantagem principal aqui é que a disponibilidade de luz é muito mais consistente, sem flutuações devido aos extremos do sol e nebulosidade; temperaturas também são mais estáveiss. O que você pode fazer é bastante simples. Uma luminária com duas lâmpadas fluorescentes de 40 watt, nós estamos falando sobre a luz encontrada em lojas de materiais elétricos tem um valor bastante baixo, que ficarão suspensa ou fixas dependendo do local onde estarão suas plantas e, estarão muito perto, quase tocando, os ápices de seu bonsai mais alto. As lâmpadas fluorescentesbrancas são mais baratas que a maioria das outras.
Mantendo seu bonsai perto das lâmpadas é importante porque a energia disponível dispersa-se para fora. O engano mais frequente dos novatos é não deixarem a fluorescente incidirem diretamente nos bonsai colocando mal a luminária ou usando luminárias fechadas. Embora eu tenha unidades fluorescentes montadas a alturas diferentes, a maioria não está mais que ( 9 polegadas ) aproximadamente 27cm da superfícies nas quais mantenho meus pequenos bonsai.
Quando eu comecei a experimentar lâmpadas fluorescente com bonsai, li algum uma publicação do Departamento norte-americano de Agricultura que sugeria 14 a 16 horas diárias de luz fluorescente em lugar fechado. Assim eu pensei por que não tentar 16 horas como uma condição. Isto funcionou bastante bem. Eu experimentei com períodos mais longos, mas retornei as 16 horas.
Um timer econômico à mão evita ter que se lembrar de ligar e desligar suas luzes. É o tipo de dispositivo que algumas pessoas usam para manter vivo seu bonsai enquanto trabalham fora.
Nas publicações que eu também li sugeriam substituir as fluorescentes usadas anualmente para plantas que ficavam ligadas por 16 horas por dia. A razão para isto é que a produção de luz diminui gradualmente com o passar do tempo. Considerando que intensidade clara será aumentada significativamente através de tubos novos, é melhor mudar uma das lâmpadas e então, em uma unidade de duas lâmpadas, espera-se um dia ou dois antes de mudar a segunda a evitando danos as bordas das folhas novas. Foi o que fiz!
ÁGUA. Minha prática foi conferir cada árvore diariamente, nada além de uma vez por dia, para ver se precisava de água. Os que estavam secos e querendo secar na superfície da terra eram molhados. Os que não estavam secos, normalmente, ficarão mais saudáveis se esperarmos o outro dia. Evite manter sua terra constantemente cheia de água. Não estando sob sol forte ou vento reduza a quantidade de água pois a diferença entre estar ao ar livre e confinada é dramática. Mesmo assim, algumas espécies secam muito mais rapidamente que outras. A experiência lhe ensinará logo qual delas tem esta característica, até mesmo ao ponto de murcharem em um dia, se não se molhou à primeira impressão de superfície seca. Ao outro extremo existem tipos que secam a terra muito lentamente e passarão vários dias antes da mistura de terra começe a parecer seca.
Incidentemente, uma redução súbita no uso da água, aumentando a velocidade da terra secar é uma situação de prestar-se atenção Tenha a certeza de que você deixou a terra de uma árvore fraca secar entre as regas mas não deixou a terra secar.
Na minha primeira experiência, molhava meus primeiros bonsai sob luz fluorescente com uma garrafa de spray como algumas pessoas usam aplicando o limpador ao lavar janelas. Cada árvore minúscula e sua terra eram molhadas completamente até que água transpassasse o buraco de drenagem. Como a coleção de bonsai em recinto fechado cresceu em número, este processo se tornou inaceitável pelo tempo consumido e minha mão se cansou. Eu achei então que poderia molhar usando uma pequena bomba molhando pouco mas eficazmente com um bom bico.
Infelizmente, a ponta da bomba era de metal e eventualmente enferrujou. A substituição de plástico extensamente disponível, quase não trabalhou bem porque sua ponta tinha uma abertura muito maior e o fluxo de água mais pesado tendeu a lavar a mistura de terra para fora dos vasos. Depois de lutar com isto por mais tempo que eu queira admitir, me ocorreu um pensamento que poderia ser possível alterar esta ponteira para limitar o fluxo de água.
Enquanto molhava depois da sucessão de bombas, eu sempre segurei minhas pequenas árvores em cima de um recipiente aberto pegar a água de drenagem. Uma noite ao molhar mais rapidamente que habitual eu fui inspirado para imergir o vaso da árvore na água de drenagem em um esforço para apressar o processo de repente. Algumas bolhas subiram para a superfície e eu ergui a árvore da água, entendi imediatamente que esta maneira de molhar era mais completa e muito mais rápida do que eu tinha estado fazendo com a bomba.
A partir daquele dia eu comecei a molhar todos meu bonsai dentro de casa imergindo-os. Isto foi bem durante algum tempo, então um acumulo de material branco começou a aparecer na terra e o musgo de algumas árvores estava começando a morrer. Pensando um pouco, eu concluí que minerais (sais) que as árvores não puderam usar estava começando a acumular, provavelmente, desde que eles não estavam sendo lixiviados. E, se eu não começasse a lixiviar minhas árvores novamente poderia sofrer. Em lugar de descontinuar molhar imergindo, o que eu comecei a fazer era imergir então em seguida usando uma solução de fertilizante muito fraca aplicada com uma bomba limpando e fertilizando ao mesmo tempo. Isto é o que eu ainda faço. Este processo de fertilização será descrito com mais detalhes abaixo.
Parece importante notar aqui que embora usando a água de nossa cidade, muito dura, água boa para os bonsai ao ar livre, uso água macia em lugar fechado. Não é uma água que foi tratada por um equipamento de tratamento de água. No passado, durante os meses úmidos, nós instalamos um desumidificador em nosso porão. A água livre mineral que colecionamos era usada molhando o bonsai dentro de casa. Mais recentemente, eu achei que a água descarregada de nosso aquecimento central novo e equipamento de ar-condicionado eram boas. A água de chuva era coletada em um recipiente de lixo grande debaixo dos beirais e levada para o porão para molhar o bonsai dentro de casa. Neve também foi trazida ocasionalmente e usada.
Não estou sugerindo que suas plantas não sobreviverão molhando com água dura. Estou convecido de que pode. É apenas um pouco mais difícil.
FERTILIZAÇÃO.
Claro que as árvores não contam com fertilizantes, também chamado de "comida de plantas", como fontes de energia. A energia delas, contida nos carboidrato, vem diretamente do sol. Tipicamente o solo, enquanto decompondo substânciaa orgânicas e fertilizantes que são as fontes energéticas para plantas com uns 20 elementos minerais (elementos nutrientes) agora considerados essenciais à saúde delas. Uso uma mistura com pouca terra para cultivar o bonsai o que torna essencial a aplicação de fertilizantes regularmente.
Minha prática de fertilização em recinto fechado foi mantida simples intencionalmente. Eu sempre uso fertilizantes comerciais como Miracid, Miraclegro, Cansa 20-20-20 ou Correnteza-gro em uma diluição bastante grande durante todo o ano. Quando estou com pressa, pode ser saltada uma aplicação. Esta solução de fertilizante faço em 5 galões ( 1 galão = 3,6lt ) acrescentando uma colher de chá rasa de fertilizante para todos eles ou seja, a concentração é um quinto de colher de chá por galão. Depois de molhar bem, parte desta solução de fertilizante fraca é escorrida pela terra. Assim, como foi declarado anteriormente, este processo lixivia e fertiliza ao mesmo tempo. Uma precaução. A experiência mostra que até mesmo esta solução fraca pode fazer muito mal a algumas árvores quando aplicadas sobre a terra seca. Tenha certeza de molhar primeiro então aplique o fertilizante. Porém, fertilizando com esta solução fraca isto pode ser feito imediatamente depois de molhar sem danos as suas plantas.
Eu não fertilizo em vaso recentemente plantado ou reenvasado até que eles comecem a produzir folhagem nova. Eu também retenho fertilizante em árvores doentes pois parece prejudicar mais que ajudar.
MISTURA MÉDIA.
A maioria das pessoas que persistem como desenvolvedores de bonsai concorda com a escolha de mistura de terra média que se você preferir, é muito importante. Entretanto confusões surgem. Além dos princípios gerais que mesmo uma terra de jardim maravilhosa é inadequada para um vaso, alta porosidade junto com boa retenção de umidade boa é o desejável, nós não concordamos com o que fazer.
Um médico bonsaísta me disse que quando muitos remédios diferentes estão sendo usados em um tratamento pode ser que nenhum deles trabalhe bem. Pense nisto!.
Esta não é certamente a última palavra em mistura de terra. É tão somente uma declaração do que eu tenho feito. De fato, isto vai soar suspeitosamente como a velha história do professor de faculdade que confiou a um colega que ele havia usado as mesmas perguntas de teste sem mudanças durante trinta anos. O amigo, surpreendido, perguntou: "Seus alunos não tiveram êxito?" a resposta do professor era: " Não, eu mudava as respostas ".
A mistura que eu usei muito tempo e sentia muito confortável com ela era uma parte de partículas pequenas de granito ( Provavelmente areia grossa ), duas partes de turfa e três partes de barro assado ( Akadama ). Barro assado?
TEMPERATURAS.
Me perguntam freqüentemente que temperatura que eu mantenho no local onde eu cultivo meus bonsai. De fato, esta temperatura muda lentamente com respeito a temperaturas ao ar livre. Em períodos longos de tempo quente, subiu tão alto quanto 84°F. Longos tempos de frio resultaram em 64°F a 66°F. Eu não tive particularmente consciência de problemas a qualquer temperatura extrema. Porém, reenvasar plantas de clima tropical durante a estação quente parecem funcionar melhor que reenvasar durante meses frios.
TIPOS DE ÁRVORES. Teoricamente qualquer árvore, arbusto ou videira que não requerem período de dormência para prosperar é uma possibilidade. Eu experimentei pessoalmente mais de tres dúzias de gêneros cultivando em lugar fechado todo o ano sem levá-los ao ar livre. Fazendo isto, logo percebi que alguns são mais fáceis de manter saudáveis que outros. Geralmente as de desenvolvimento mais fáceis são as mencionadas freqüentemente como material para serem usados dentro de casa em livros de bonsai e revistas.
Algumas espécies favoritas com as quais me senti recompensado foram: formas anãs de buxinho (spp de Buxus); tipos pequeno-copados de cotoneaster (spp de Cotoneaster); figos (spp de Ficus) e especialmente (pumila de Ficus); murta grega (communis de Myrtus), especialmente a forma anã (communis de Myrtus ' Compacta'); (spp de Pyracantha.), especialmente a variedade anã ' Teton '; azaléias (spp de Rhododendron); sweetplums chinês (theezans de Sageretia) e serissas (spp de Serissa), especialmente alguns dos clones de neve-rosa.
Agora, vejamos o quê fazer com as sempre verdes de agulha sob luz fluorescente? Eu ouvi novamente e mais de uma vez que juníperos (spp de Juniperus.) não crescem em lugar fechado por qualquer período mais longo de tempo. Mesmo jurando que meus dois juníperus estão, respectivamente a 19 e 21 anos dentro de casa, pessoas que leram este artigo dizem que isto não é possível. Admito que o crescimento dos juníperos debaixo de luz fluorescente é muito mais lento mas, eles sobrevivem e são saudáveis.
Estou convencido que a maioria das pessoas, tentando ser agradável às suas árvores molham demais os juníperos em lugar fechado. Deixe a terra secar definitivamente entre as regas. Incidentemente, buxinhos, cotoneasters e serissas respondem bem também a este tratamento; a maioria das azaléias também em minha experiência.
Outras sempre-vivas de agulha que ficaram bem em lugar fechado com luz fluorescente são verdadeiros ciprestes (spp de Cupressus.), falsos ciprestes (spp de Chamaecyparis), e surpreendentemente, a pequena pedra preciosa o abeto vermelho de Noruega (abies de Picea ' Pequeno Gem'). Agora, alguns tipos em lugar fechado viveram um período mas foram gradualmente perdendo forma parecendo precisar de um período de dormência, isto deve ser notado aqui também. Elas são anseia (spp de Pinus), maples (spp de Acer), marmelo (spp de Chaenomeles) e spirea (spp de Spiraea). Eu sugiro que você faz um esforço para adquirir alguns dos tipos de árvores que eu especialmente desfrutei, mas seja aventureiro e também experimente. Quanto mais espécies que você tentar, mais você se divertirá, e no final das contas você terá mais bonsai também.
OUTROS ASSUNTOS.
Com que freqüência replanto meus bonsai em recinto fechado? Eu deixei algumas árvores por seis anos para reenvasar e algumas delas morreram. Minha meta agora é replantar em dois ou, no máximo, ciclo de três anos porque parece melhor para o bonsai.
Lembre-se, físicos nos falam que o oxigênio se difunde 10,000 vezes mais rapidamente por ar que por água! Portanto a areação correta no vaso é uma maneira de preservar sua árvore.
Se você é um novato e leu este longo artigo sem se intimidar, termine este artigo e vá adquirir algumas plantas - mais que algumas - você não terá muito investimento, nem monetário e nem emocional; comece sua própria experiência para descobrir o que manterá seu bonsai vivo. Oh! sim. Se você realmente quiser cultivar bonsai debaixo de luz fluorescente ou de qualquer outro modo, não se renda muito facilmente!
*Este texto é uma atualização do Jack’s "Growing Fluorescent Light Bonsai as Winter Therapy" artigo publicado na: International Bonsai, Edição No. 4, 1996; e na Bonsai [Britânica], Edição No. 34, Verão de 1997
Quando visitei Gilbert Edelstein em New York, 1998, vi pela primeira vez bonsai sob luz fluorescente. Gilbert informou que tinha plantas que já estavam ali por 7 anos
É interessante observar como a copa das árvores estão próximas das lâmpadas
O estúdio do Gilbert fica no 4.o andar em um edifício comercial.
Alguns trechos desta matéria foram propositadamente omitidos por termos o assunto em outros artigos na página.
Qualquer ajuda para melhorar a tradução será bem vinda. Veja o original e logo abaixo a tradução:
HOW I'VE BEEN GROWING BONSAI INDOORS UNDER
FLOURESCENT LIGHT *
by Jack Wikle (Ann Arbor, Michigan)
Twenty five years ago, when my first experiments with growing little trees under fluorescent light began, I had one distinct advantage over today's bonsai beginners. At the time, I hadn't read a lot of books and articles making the whole project sound almost impossible.
I hadn't been told you have to mist the foliage regularly. I hadn't been told I'd need a humidifier or cool mist vaporizer. I hadn't been told you have to run a fan to circulate air. I hadn't been told cheap, cool white, fluorescent tubes need to be supplemented with incandescent bulbs. And, I hadn't been told most plants grown indoors still need a cold rest period with temperatures below 50°F. for several weeks each year.
READ THIS CAREFULLY! I am not following today and have not followed any of the procedures listed above. This is not to say some of those practices might not have helped my indoor bonsai grow faster, flower more or look healthier. I don't know. Not being able to offer broader experience, I can only record what has worked "well enough" for me.
When I began hearing then reading that one could grow plants adequately well indoors without special or expensive "grow lights," my winters for ten years had been spent dreaming about bonsai I would grow outdoors come spring and I had a shelf cluttered with attractive little bonsai pots, pots too small to keep anything alive in outdoors with only the once a day attention I was willing to give.
AHA! This might be a way to use those tiny pots and grow bonsai --- and grow as a bonsai enthusiast --- year around. Two small rooted cuttings of pyracantha were brought in from outdoors. The "shop light" was dropped down over my workbench next to the furnace. And the experiment, the indoor fun that continues today, began.
It soon became apparent that fluorescent light bonsai growing offers a number of advantages. It is a very controlled situation with no weather extremes. Trees grow year around so one can practice and make bonsai progress year around. It is great winter therapy available even when it's cold and dark outside. It is good use for those irresistible little pots one tends to accumulate. And, it makes possible growing a surprising number of small bonsai close at hand in a very limited space.
Suppose you are compelled to try fluorescent light bonsai too. What do you need to know? What will you need to do? Actually, a tree's basic requirements are few. Provide light, water, fertilizer, suitable growing medium and protection from extremely hot or extremely cold temperatures and success is highly likely if not guaranteed. Of course, starting with healthy plant material tolerant of indoor growing conditions will be a big boost for your growing project too. Let's discuss each of these issues in turn. LIGHT. Usually, the first question that arises is "do I have to use fluorescent light?" "Can't I grow my indoor trees near a window?" Well, yes. Most kinds of plants people grow as indoor bonsai can, if rotated regularly, be grown successfully using only the light from a nearby window. If African violets or other house plants grown for their flowers --- rather than foliage plants which are, generally, more dark tolerant --- survive near your window, growing indoor bonsai in the same location should be no problem. You can find out what you can do in window light by experimenting. Plants commonly recommended for indoor bonsai will survive well enough. Common plants are common because they are tolerant; they take abuse.
Although some adjustment must take place when trees come in and go out, moving these window bonsai outdoors --- if you want to do that --- during the warm months will strengthen them and increase growth.
Having said you can grow bonsai in window light, I still feel you make it easier for yourself and your indoor trees --- especially if window space is limited --- if you substitute even the most economical kind of fluorescent lighting for window light. The major advantage here is that light availability is very consistent without fluctuations due to extremes of sun and cloudiness; temperatures are more even also.
What you can do is simple enough. A standard four foot, two tube, 40 watt fluorescent unit --- we are talking about the shop light with reflector costing less than $20 at the local discount store --- is suspended or supported from below in such a way that the tubes are very close to --- almost touching --- the tops of your tallest bonsai. The tubes are cool white, cheaper than most others.
You can't picture this? Imagine two, three-gallon size, plastic, nursery containers upside down on a table, their centers about four feet apart, and the ends of the shop light reflector resting on these containers. You can build supports requiring less space but I've used this nursery pot setup repeatedly when I needed quick extra lighting. Keeping your bonsai close to the tubes is important because the light energy available to plants drops off dramatically moving away from the source. The mistake beginners most often make is not keeping fluorescent light bonsai close enough to the tubes. Although I have fluorescent units mounted at different heights, most are not more than nine inches above the surfaces on which my little bonsai sit.
When I began experimenting with fluorescent light bonsai, I read some U.S. Department of Agriculture publications suggesting 14 to 16 hours of fluorescent light daily is adequate for growing plants indoors. So I thought why not try 16 hours as a compromise. This has worked quite well. I have experimented with longer light periods, but keep coming back to 16 hours.
An economical timer is handy to avoid having to remember to turn your lights on and off. The kind of device some people use to control a light and make their home look lived in when they are away will work.
The publications I read also suggested replacing fluorescent tubes used for growing plants annually if they are on 16 hours a day. The reason for this is that light output diminishes gradually over time. Since light intensity will be increased significantly by fresh tubes, it is best to change one of the tubes in a two-tube unit one day then wait a day or two before changing the second tube to avoid damage to delicate growing tips. This is what I've done.
WATER. My practice has been to check each tree daily --- nothing more than once a day --- to see if it needs water. Those that are dry or becoming dry on the soil surface are watered. Those that are not dry will usually be healthier if they wait another day. Avoid keeping your soil constantly full of water. Not being in strong sun or wind slows the drying of these little trees dramatically compared with the same size pot outdoors. Even so, some species dry much more rapidly than others, Experience will soon tell you which ones get extremely dry --- even to the point of wilting --- in a day if not watered at the first hint of surface drying. At the other extreme are those kinds that dry the soil very slowly and will go several days before the soil mix begins to look dry at all.
Incidentally, a sudden reduction in water use, a sudden slowing of soil drying, by any tree is a warning that it is struggling and this is a time to be very careful in watering. Make sure you let the soil of a weak tree dry between waterings but do not let it stand dry.
Watering of my first few experimental fluorescent light bonsai was done with a spray bottle like some people use in applying cleaner when washing windows. Each tiny tree and its soil were misted thoroughly until water ran through the drain hole. As the indoor bonsai collection grew in number, this process became unacceptably time consuming and my hand got tired. I then found I could water more efficiently using a small watering pitcher with a fine spout.
Unfortunately, the pitcher that functioned well was metal and eventually rusted out. The plastic replacement widely available, about one and a half quart capacity, didn't work nearly as well because its spout had a much larger opening and the heavier water stream tended to wash soil mix out of little pots. After struggling with this for longer than one likes to admit, the thought occurred that it might be possible to alter this spout to limit the water flow. Ultimately, a small, four-hole, shirt button was secured to the tip of the spout with epoxy. This has worked very well; enough water flow and not too much.
While watering with the mister and later the succession of pitchers, I always held my little trees over an open container to catch the drainage water. One evening when watering more hurriedly than usual I was suddenly inspired to immerse the pot of the tree being watered in the drainage water in an effort to accelerate the process. A few bubbles rose to the surface and as I lifted the tree from the water, I understood immediately that this watering was more thorough and much quicker than what I had been doing with mister and pitchers.
From that day on I began watering all my indoor bonsai by immersing the soil. This went along well for a while, then an accumulation of whitish material began to appear on the soil and the moss of some trees was beginning to die. Thinking about this a bit, I concluded that minerals (salts) the trees couldn't use were probably beginning to accumulate since they were not being leached, or flushed away by running water through the soil. And, if I didn't begin leaching again my trees might suffer.
Rather than discontinue watering by dipping, what I began doing was to dip then follow up with a very weak fertilizer solution applied with the modified watering pitcher thus leaching and fertilizing at the same time. This is what I still do. This fertilizing process will be described in more detail below. It seems important to note here that although I've gotten by using our town's very hard, well water on my outdoor bonsai, I use soft water indoors. This is not water that has been treated by a water softener. In the past, during the humid months, we have run a dehumidifier in our basement. The mineral free water it collected was used in watering the indoor bonsai. More recently, I’ve found that water discharged from our new central heating and air-cooling equipment works fine too. When water released by combustion and air conditioning processes runs low, rainwater caught in a large trash container set under the eaves is carried to the basement to water the indoor bonsai. Snow also has been brought in occasionally and the melt water used.
This is not to suggest that you can't get by watering indoors with hard water. I am convinced you can. It's just more difficult and regular leaching becomes more important.
Note: To water freshly potted trees without washing all the soil mix away, a basting syringe or similar bulb syringe works very well until enough roots have grown to secure the soil mix when dipping. FERTILIZER. Of course trees do not rely on fertilizers, so-called "plant foods," as energy sources. Their energy, held in the tree as carbohydrate, comes directly from the sun. Typically soil, decomposing organic matter and fertilizer are the sources for plants of some 20 mineral elements (nutrient elements) now considered essential to their health. Use of soil-less mixes to grow our bonsai makes regular fertilizer application essential.
My indoor fertilizing practice has been intentionally kept simple. I have used commercial fertilizers such as Miracid, Miraclegro, Peters 20-20-20 or Rapid-gro in very dilute solution applied almost every watering year around. When in a big hurry, an application may be skipped. This fertilizer solution is made up five gallons at a time by adding one level teaspoon of fertilizer to five gallons of water; so the concentration is one-fifth teaspoon per gallon.
After watering well, some of this weak fertilizer solution is run through the soil. So, as stated earlier, this process leaches and fertilizes at the same time. One caution. Experience shows that even this weak solution can do a lot of damage to some trees when applied on dry soil. Make sure you water first then apply the fertilizer. However, fertilizing with this weak solution can be done immediately after watering without damage.
I do not fertilize newly potted or repotted trees until they begin to produce new foliage. I also withhold fertilizer from sick trees since it seems to do more harm than good.
GROWING MEDIUM. Most people who persist as bonsai growers agree that choice of soil mix, "growing medium" if you prefer, is very important. But then confusion arises. Beyond the general principles that wonderful garden soil is inadequate in a pot and high porosity coupled with good moisture retention are desirable, we don't agree on what to do.
A bonsai growing doctor tells me that in medicine when many different remedies are being used in treating a problem you can be sure none of them work well. Makes one think.
This is certainly not the last word on soil mix. It is merely a statement of what I've been doing. Actually, this is going to sound suspiciously like the old story of the college professor who confided to a colleague that he'd used the same test questions without change for thirty years. His astounded friend was compelled to ask, "Didn't your students catch on?" The professor's response was, "No, I just changed the answers."
The mix I used longest and felt very comfortable with was one part, by volume, starter chicken grit (small particles of granite) available at stores dealing in livestock feed, two parts sphagnum peat (not sphagnum moss) available in bales at our local garden centers and three parts baked clay. Baked clay? Early in my experiments, the baked clay was clay cat litter. I soon discovered clay cat litter can be quite variable and that it was necessary to put a handful of the material in a jar of water and shake it up to see if the particles disintegrated before using it in my soil mix. What I wanted were stable particles that did not turn into mud when wetted.
I have also used with success several of the baked clay products sold for scattering on floors to soak up oil and grease where automobiles are repaired. Again, these products are somewhat variable and it is good to shake a sample in water before incorporating the material in one’s soil mix.
Although more expensive, the baked clay I use now is the product Turface used in constructing golf greens and athletic fields. I have not had a problem with Turface particles disintegrating. I buy the particle size now labeled "MVP" and screen this over an eight-mesh screen (eight openings per inch). Material retained on the screen goes into a coarser mix used for large trees outdoors and for a drainage layer in a few of my bigger indoor bonsai containers. Turface passing through the eight-mesh screen and retained on window screen (sixteen-mesh) is what I use in my "regular" 1-2-3 indoor mix. Even though the starter chicken grit particles are mostly a good size, screening them over window screen eliminates some dust.
The sphagnum peat is whisk-broomed through a four-mesh screen to break up clumps and remove larger chunks of debris. Then it is shaken through a five-mesh screen to separate the useful material into two sizes. Larger peat particles passing the four-mesh and retained on the five-mesh screen are used --- with the larger Turface --- in my coarse mix. It is peat that passes the five-mesh screen then is retained on a sixteen-mesh screen, used to remove fines and dust, that goes into regular, 1-2-3, indoor mix.
After screening, the three ingredients --- grit, peat, and clay in 1-2-3 proportions --- are then blended until the mix looks uniform. Too much mixing just generates more dust. In recent years, tiring of screening peat and feeling that a faster drying mix might be superior to the 1-2-3 ratio, I have experimented with a I grit, I peat, 3 clay mix and been very happy with it. At one time, I experimented with a peatless mix of I part grit: 3 parts baked clay then gave it up because it dried too quickly. Most recently, I have begun trial use of a mix of I grit, 1 peat, and 4 parts clay. It is still too early to say how this is working out.
No matter what ingredients one chooses, screening them over sixteen-mesh screen to eliminate fine particles and dust, thus opening up the spaces between the larger particles, should always be beneficial.
If you are wondering how different in water retention and aeration after watering your soil mix is from my 1-2-3 mix, there is a quick way to make some comparisons. All you will need are a measuring cup of water and an eight-ounce foam cup completely full of your dry soil mix. From the measuring cup, add water slowly to your soil mix until you have filled all the space between and within the particles. Note the amount of water used. Compare this figure with water amounts ranging from 4.25 to 4.75 ounces required to fill the space in the same quantity of my 1-2-3 mix.
Now, holding the foam cup --- full of water and soil mix --- over the measuring cup, slash the bottom edge in several places so water can drain freely. Note the amount of drainage collected. Compare this number with 0.85 to 1.24 ounces of drainage from my mix.
Not being able to add at least 4 ounces of water to 8 ounces of soil is reason to be skeptical. Drainage amounts much less than 0.75 or much more than 1.25 ounces are also questionable. TEMPERATURES. I am often asked what temperature I maintain in the basement where I grow my indoor bonsai. Actually, this temperature changes slowly in response to outdoor temperatures. In periods of extended warm weather, it has risen as high as 84°F. Extended cold results in a chilly basement with temperatures in the 64°F to 66°F range. I have not been particularly conscious of growing problems at either temperature extreme. However, repotting warm climate plants during the warm season does seem to work better than repotting during cold months.
KINDS OF TREES, Theoretically any tree, shrub or vine that doesn't require a cold, dormant period to thrive is a possibility. I have personally experimented with plants from more than three dozen genera growing them as bonsai indoors year around with no outdoor vacations. In doing this, it was soon apparent that some are easier to keep healthy than others. Generally the easier ones are those mentioned most often as indoor material in bonsai books and magazines.
Some personal favorites, kinds I have found very rewarding, are dwarf forms of boxwood (Buxus spp.); small-leaved kinds of cotoneaster (Cotoneaster spp.); figs (Ficus spp.), especially creeping fig (Ficus pumila); Greek myrtle (Myrtus communis), especially the dwarf form (Myrtus communis 'Compacta'); firethorns (Pyracantha spp.), especially the dwarf variety 'Teton’; azaleas (Rhododendron spp.), especially 'Hino Crimson’; Chinese sweetplums (Sageretia theezans); and serissas (Serissa spp.), especially some of the snow-rose clones.
Also, do not ignore small-leaved clones of English ivy (Hedera helix) They are exceedingly difficult to kill, cuttings are guaranteed to root and nice trunks develop much more quickly than most people expect. Now, how about needle evergreens as fluorescent light bonsai? I have heard again and again that junipers (Juniperus spp.) cannot be grown indoors for any length of time. I know that even if I swear here that my two oldest indoor junipers have grown inside under cool white fluorescent light for 21 and 19 years respectively with no outdoor vacations, there will be those who read this and continue to assure their friends that it cannot be done. Admittedly juniper growth is slow under fluorescent light, but they survive and are healthy.
I am convinced that most people, trying to be nice to their trees, over water junipers indoors. Let the soil surface of the established juniper get definitely dry between waterings. Incidentally, boxwoods, cotoneasters and serissas respond well to this treatment too; most azaleas also in my experience. Other needle evergreens that have done well for me indoors under fluorescent light are true cypresses (Cupressus spp.), false cypresses (Chamaecyparis spp.), and surprisingly, little gem Norway spruce (Picea abies 'Little Gem').
Now, some kinds tried indoors which lived for a while but gradually declined, seeming to need a cold dormant period and/or changing day length, must be noted here too. They are pines (Pinus spp.), maples (Acer spp.), quince (Chaenomeles spp.) and spirea (Spiraea spp.).
I suggest that you make an effort to get some of the kinds of trees I've especially enjoyed, but be adventurous and experiment too. The more species you try, the more fun you will have, and ultimately you will have more bonsai too.
OTHER ISSUES. We need to talk about clear "plastic," actually polyethylene, bags. Caution! Do not put a plant enclosed in a poly bag in direct sun. It can get very hot, what scientists call the greenhouse effect. However, the same poly bag --- I use Baggies purchased at the local supermarket --- can be very useful to the fluorescent light horticulturist because this light doesn't cause the extreme heating inside the bag that sunlight does.
My understanding is that there are microscopic pores in these bags, pores small enough to prevent water molecules from escaping yet large enough to allow oxygen and carbon dioxide exchange between air inside and outside the bag. A bonsai enclosed in one of these bags cannot dry out. The humidity inside is 100 percent. After watering thoroughly, I enclose any newly potted or repotted tree in a poly bag. The bag is dropped over the tree and its pot then folded underneath the pot so the bonsai is completely enclosed. This gives the disturbed tree time to make internal adjustments in a relatively stress free environment.
I usually leave the tree bagged under the fluorescent light about a week, not much longer. Swelling buds and new growth are signals that it is time for the tree to come out. This abrupt change from extremely moist to drier air can be quite a shock to a weak plant. What I do to ease the transition --- I call it programmed re-entry --- is to remove the poly bag for just half an hour the first day I take it off. In the case of an unusually sensitive or weak tree, this first outing may be only 15 minutes. Then next day the bag is taken off twice as long. The next day the out time is doubled again. This doubling each day continues until the tree is out for eight hours. When the tree comes out the next day, it stays out, usually without curling a leaf.
The same technique can be used during vacations. Before I accumulated too many indoor bonsai for it to be practical, I watered my trees well, bagged them and left them under the fluorescent lights for as long as two weeks without problems. Well, some trees did die when I pulled the bags off before I realized it was necessary to go through the programmed re-entry again.
How often do I repot my indoor bonsai? I've let some trees go as long as six years between repottings and some of them died. My goal now is to repot on a two or, at the most, three-year cycle because it seems less stress on the bonsai.
Dean Bull's "The Capillary Siphon" article --- BCI Magazine, Vol. 31, No. 57, Sep-Oct 1992 --- opened my eyes. His suggestion was to use cord from a rayon mop head as a drainage wick, Somehow, Dean's idea had not occurred to me. This certainly would be simpler and probably more effective than techniques I'd tried in an effort to pull water from wet-standing pots to save weak and dying bonsai. The first cord mop head I found was cotton and not nearly as active in wicking as I expected. So I went back for a rayon mop head and did find its strings wick much better.
Using curved tweezers, I push about 3/4 inch or so of mop string, depending on pot size, through the waterlogged pot's drain hole and past the screen covering the drain hole so the string's end lies in that very wet zone where soil mix rests on the pot floor. The rest of the foot or two of cord runs to the table edge and hangs over, Water from the saturated layer runs down the wick quickly. This leaves the soil above moist but with much more of its pore space air-filled so the tree's roots are not suffocating for lack of oxygen.
This is in contrast to the sick tree standing abnormally long in water-logged soil because being weak it is not using much water, and because roots need oxygen to be efficient in taking up water even though it is all around them. Remember that soil physicists tell us oxygen diffuses 10,000 times faster through air than through water! Better set a container beneath the dangling string if you don't want a puddle there. I call these mop strings "bonsai life savers." I am sure they saved the lives of several weak trees for me.
If you are a beginner and have read this far without being too intimidated, finish this article and go get yourself some plants --- more than a few --- that you don't have too much invested in monetarily and emotionally, then start your own experiment to find out what it takes for you to keep them alive. Oh yes. If you really want to grow bonsai under fluorescent light or any other way, don't give up too easily! ________________________________________________________________ * This text is an update of Jack’s "Growing Fluorescent Light Bonsai as Winter Therapy" article published in: International Bonsai, Issue No. 4, 1996; and in Bonsai [British], Issue No. 34, Summer, 1997. Additional © Jack Wikle & Fuku-Bonsai Inc., 1992
COMENTÁRIO
COMO TENHO DESENVOLVIDO BONSAI DENTRO DE CASA SOB
LUZ FLUORESCENTE
por Jack Wikle (Ann Arbor, Michigan)
Vinte cinco anos atrás, quando minha primeira experiência em cultivar bonsai debaixo de luz fluorescente começou, eu tive uma vantagem distinta com relação aos novatos na Arte Bonsai de hoje. Na ocasião, eu não tinha lido muitos livros e artigos que faziam com que o projeto inteiro soasse quase impossível.
Ninguém me disse que tinha que vaporizar as folhagen regularmente. Ninguém me disse que eu tinha que ter um umidificador ou vaporizador. Ninguém me disse que eu precisaria de um circulador de ar. Ninguém me disse que precisaria de luz fluorescente branca complementadas com bulbos incandescentes. E, eu não tinha sido avisado que a maioria das plantas desenvolvidas em lugar fechado ainda precisam de um período frio com temperaturas abaixo de 50°F. durante várias semanas cada ano.
LEIA ISTO CUIDADOSAMENTE!
Eu não estou seguindo hoje e não segui quaisquer dos procedimentos listado acima. Isto não quer dizer que algumas dessas práticas, se eu as tivesse usado, poderiam ter ajudado meus bonsai dentro de casa crescerem mais rapidamente, florescer e parecerem mais saudáveis. Eu não sei. Não posso oferecer experiência maior, posso registrar o que resultou " bom o bastante " para mim do meu trabalho.
Quando eu comecei a ouvir e então ler que poderia cultivar plantas adequadamente, em lugar fechado, sem lâmpadas caras ou especiais, por dez anos, no inverno, sonhava com os bonsai que teria do lado de fora na primavera pois tinha uma estante atravancada com pequenos e atraentes vasos de bonsai, vasos muito pequenos para que se mantivessem vivos com a atenção que eu poderia dispensar. Uma vez ao dia!
AHA! Este poderia ser um modo para usar esses vasos minúsculos e cultivar bonsai, e crescer como bonsaísta, todo ano. Duas estacas de raízes de pequenas piracantas foram trazidos de fora. A luz fluorescente foi colocada em cima de minha bancada próximo a um forno. E a experiência, a diversão em recinto fechado que continua até hoje, começou.
Ficou visível que a lâmpada fluorescente oferecia diversas vantagens. É uma situação muito controlada sem os extremos de tempo. Árvores cultivadas desta maneira podem fazer um bonsai desenvolver-se durante todo ano. É até mesmo uma grande terapia de inverno quando o frio e escuro da estação não nos permite estar fora de casa. É um bom uso para os pequenos vasos de bonsai que costumamos acumular. E, faz possível o desenvolvimento de um número surpreendente de pequenos bonsai próximos à mão em um espaço muito limitado.
Suponha você seja compelido a tentar fazer bonsai sob luz fluorescente também. O que você precisa saber? O que precisará fazer? De fato, as exigências básicas de uma árvore são poucas. Proveja luz, água, fertilizante e proteção de temperaturas extremamente quentes ou extremamente frias que poderá ver o seu desenvolvimento; o sucesso é altamente provável se não garantido. Claro que, começando com materiais saudáveis e, de preferência que tolerem as condições de recinto fechado serão um grande aumento para seu projeto de crescimento. Discutamos cada variante destes assuntos.
LUZ
. Normalmente, a primeira pergunta que surge é: Tenho que usar luz fluorescente? Não posso cultivar minhas árvores em recinto fechado perto de uma janela? Pode!. A maioria das das pessoas que desenvolve bonsai dentro de casa costumam cultivá-los próximo a uma janela. Se violetas africanas ou outras plantas para as flores, assim como folhagens, plantas que são, geralmente, de coloração verde escuro e mais tolerante, sobrevivem próximo a sua janela, podemos concluir que bonsai no mesmo recinto fechado não deveriam ter nenhum problema.
Você descobrirá o que você pode fazer com a iluminação da janela experimentando. Plantas comumente recomendado para bonsai em recinto fechado sobreviverão bem. Plantas comuns são comuns porque são tolerantes; elas aceitam mais.
Embora algum ajustes sejam necessários quando as árvores entram e saem, quando queremos movê-las para o ar livre para aproveitar os meses quentes que as fortalecerão e ajudarão no crescimento. Tendo dito que você pode cultivar bonsai a luz de janela, eu ainda sinto que você fará isto mais fácil para você e suas árvores em recinto fechado, especialmente se o espaço da janela está limitado, e se você pode substituir pelo tipo mais econômico de iluminação fluorescente até mesmo para a luz da janela. A vantagem principal aqui é que a disponibilidade de luz é muito mais consistente, sem flutuações devido aos extremos do sol e nebulosidade; temperaturas também são mais estáveiss. O que você pode fazer é bastante simples. Uma luminária com duas lâmpadas fluorescentes de 40 watt, nós estamos falando sobre a luz encontrada em lojas de materiais elétricos tem um valor bastante baixo, que ficarão suspensa ou fixas dependendo do local onde estarão suas plantas e, estarão muito perto, quase tocando, os ápices de seu bonsai mais alto. As lâmpadas fluorescentesbrancas são mais baratas que a maioria das outras.
Mantendo seu bonsai perto das lâmpadas é importante porque a energia disponível dispersa-se para fora. O engano mais frequente dos novatos é não deixarem a fluorescente incidirem diretamente nos bonsai colocando mal a luminária ou usando luminárias fechadas. Embora eu tenha unidades fluorescentes montadas a alturas diferentes, a maioria não está mais que ( 9 polegadas ) aproximadamente 27cm da superfícies nas quais mantenho meus pequenos bonsai.
Quando eu comecei a experimentar lâmpadas fluorescente com bonsai, li algum uma publicação do Departamento norte-americano de Agricultura que sugeria 14 a 16 horas diárias de luz fluorescente em lugar fechado. Assim eu pensei por que não tentar 16 horas como uma condição. Isto funcionou bastante bem. Eu experimentei com períodos mais longos, mas retornei as 16 horas.
Um timer econômico à mão evita ter que se lembrar de ligar e desligar suas luzes. É o tipo de dispositivo que algumas pessoas usam para manter vivo seu bonsai enquanto trabalham fora.
Nas publicações que eu também li sugeriam substituir as fluorescentes usadas anualmente para plantas que ficavam ligadas por 16 horas por dia. A razão para isto é que a produção de luz diminui gradualmente com o passar do tempo. Considerando que intensidade clara será aumentada significativamente através de tubos novos, é melhor mudar uma das lâmpadas e então, em uma unidade de duas lâmpadas, espera-se um dia ou dois antes de mudar a segunda a evitando danos as bordas das folhas novas. Foi o que fiz!
ÁGUA. Minha prática foi conferir cada árvore diariamente, nada além de uma vez por dia, para ver se precisava de água. Os que estavam secos e querendo secar na superfície da terra eram molhados. Os que não estavam secos, normalmente, ficarão mais saudáveis se esperarmos o outro dia. Evite manter sua terra constantemente cheia de água. Não estando sob sol forte ou vento reduza a quantidade de água pois a diferença entre estar ao ar livre e confinada é dramática. Mesmo assim, algumas espécies secam muito mais rapidamente que outras. A experiência lhe ensinará logo qual delas tem esta característica, até mesmo ao ponto de murcharem em um dia, se não se molhou à primeira impressão de superfície seca. Ao outro extremo existem tipos que secam a terra muito lentamente e passarão vários dias antes da mistura de terra começe a parecer seca.
Incidentemente, uma redução súbita no uso da água, aumentando a velocidade da terra secar é uma situação de prestar-se atenção Tenha a certeza de que você deixou a terra de uma árvore fraca secar entre as regas mas não deixou a terra secar.
Na minha primeira experiência, molhava meus primeiros bonsai sob luz fluorescente com uma garrafa de spray como algumas pessoas usam aplicando o limpador ao lavar janelas. Cada árvore minúscula e sua terra eram molhadas completamente até que água transpassasse o buraco de drenagem. Como a coleção de bonsai em recinto fechado cresceu em número, este processo se tornou inaceitável pelo tempo consumido e minha mão se cansou. Eu achei então que poderia molhar usando uma pequena bomba molhando pouco mas eficazmente com um bom bico.
Infelizmente, a ponta da bomba era de metal e eventualmente enferrujou. A substituição de plástico extensamente disponível, quase não trabalhou bem porque sua ponta tinha uma abertura muito maior e o fluxo de água mais pesado tendeu a lavar a mistura de terra para fora dos vasos. Depois de lutar com isto por mais tempo que eu queira admitir, me ocorreu um pensamento que poderia ser possível alterar esta ponteira para limitar o fluxo de água.
Enquanto molhava depois da sucessão de bombas, eu sempre segurei minhas pequenas árvores em cima de um recipiente aberto pegar a água de drenagem. Uma noite ao molhar mais rapidamente que habitual eu fui inspirado para imergir o vaso da árvore na água de drenagem em um esforço para apressar o processo de repente. Algumas bolhas subiram para a superfície e eu ergui a árvore da água, entendi imediatamente que esta maneira de molhar era mais completa e muito mais rápida do que eu tinha estado fazendo com a bomba.
A partir daquele dia eu comecei a molhar todos meu bonsai dentro de casa imergindo-os. Isto foi bem durante algum tempo, então um acumulo de material branco começou a aparecer na terra e o musgo de algumas árvores estava começando a morrer. Pensando um pouco, eu concluí que minerais (sais) que as árvores não puderam usar estava começando a acumular, provavelmente, desde que eles não estavam sendo lixiviados. E, se eu não começasse a lixiviar minhas árvores novamente poderia sofrer. Em lugar de descontinuar molhar imergindo, o que eu comecei a fazer era imergir então em seguida usando uma solução de fertilizante muito fraca aplicada com uma bomba limpando e fertilizando ao mesmo tempo. Isto é o que eu ainda faço. Este processo de fertilização será descrito com mais detalhes abaixo.
Parece importante notar aqui que embora usando a água de nossa cidade, muito dura, água boa para os bonsai ao ar livre, uso água macia em lugar fechado. Não é uma água que foi tratada por um equipamento de tratamento de água. No passado, durante os meses úmidos, nós instalamos um desumidificador em nosso porão. A água livre mineral que colecionamos era usada molhando o bonsai dentro de casa. Mais recentemente, eu achei que a água descarregada de nosso aquecimento central novo e equipamento de ar-condicionado eram boas. A água de chuva era coletada em um recipiente de lixo grande debaixo dos beirais e levada para o porão para molhar o bonsai dentro de casa. Neve também foi trazida ocasionalmente e usada.
Não estou sugerindo que suas plantas não sobreviverão molhando com água dura. Estou convecido de que pode. É apenas um pouco mais difícil.
FERTILIZAÇÃO.
Claro que as árvores não contam com fertilizantes, também chamado de "comida de plantas", como fontes de energia. A energia delas, contida nos carboidrato, vem diretamente do sol. Tipicamente o solo, enquanto decompondo substânciaa orgânicas e fertilizantes que são as fontes energéticas para plantas com uns 20 elementos minerais (elementos nutrientes) agora considerados essenciais à saúde delas. Uso uma mistura com pouca terra para cultivar o bonsai o que torna essencial a aplicação de fertilizantes regularmente.
Minha prática de fertilização em recinto fechado foi mantida simples intencionalmente. Eu sempre uso fertilizantes comerciais como Miracid, Miraclegro, Cansa 20-20-20 ou Correnteza-gro em uma diluição bastante grande durante todo o ano. Quando estou com pressa, pode ser saltada uma aplicação. Esta solução de fertilizante faço em 5 galões ( 1 galão = 3,6lt ) acrescentando uma colher de chá rasa de fertilizante para todos eles ou seja, a concentração é um quinto de colher de chá por galão. Depois de molhar bem, parte desta solução de fertilizante fraca é escorrida pela terra. Assim, como foi declarado anteriormente, este processo lixivia e fertiliza ao mesmo tempo. Uma precaução. A experiência mostra que até mesmo esta solução fraca pode fazer muito mal a algumas árvores quando aplicadas sobre a terra seca. Tenha certeza de molhar primeiro então aplique o fertilizante. Porém, fertilizando com esta solução fraca isto pode ser feito imediatamente depois de molhar sem danos as suas plantas.
Eu não fertilizo em vaso recentemente plantado ou reenvasado até que eles comecem a produzir folhagem nova. Eu também retenho fertilizante em árvores doentes pois parece prejudicar mais que ajudar.
MISTURA MÉDIA.
A maioria das pessoas que persistem como desenvolvedores de bonsai concorda com a escolha de mistura de terra média que se você preferir, é muito importante. Entretanto confusões surgem. Além dos princípios gerais que mesmo uma terra de jardim maravilhosa é inadequada para um vaso, alta porosidade junto com boa retenção de umidade boa é o desejável, nós não concordamos com o que fazer.
Um médico bonsaísta me disse que quando muitos remédios diferentes estão sendo usados em um tratamento pode ser que nenhum deles trabalhe bem. Pense nisto!.
Esta não é certamente a última palavra em mistura de terra. É tão somente uma declaração do que eu tenho feito. De fato, isto vai soar suspeitosamente como a velha história do professor de faculdade que confiou a um colega que ele havia usado as mesmas perguntas de teste sem mudanças durante trinta anos. O amigo, surpreendido, perguntou: "Seus alunos não tiveram êxito?" a resposta do professor era: " Não, eu mudava as respostas ".
A mistura que eu usei muito tempo e sentia muito confortável com ela era uma parte de partículas pequenas de granito ( Provavelmente areia grossa ), duas partes de turfa e três partes de barro assado ( Akadama ). Barro assado?
TEMPERATURAS.
Me perguntam freqüentemente que temperatura que eu mantenho no local onde eu cultivo meus bonsai. De fato, esta temperatura muda lentamente com respeito a temperaturas ao ar livre. Em períodos longos de tempo quente, subiu tão alto quanto 84°F. Longos tempos de frio resultaram em 64°F a 66°F. Eu não tive particularmente consciência de problemas a qualquer temperatura extrema. Porém, reenvasar plantas de clima tropical durante a estação quente parecem funcionar melhor que reenvasar durante meses frios.
TIPOS DE ÁRVORES. Teoricamente qualquer árvore, arbusto ou videira que não requerem período de dormência para prosperar é uma possibilidade. Eu experimentei pessoalmente mais de tres dúzias de gêneros cultivando em lugar fechado todo o ano sem levá-los ao ar livre. Fazendo isto, logo percebi que alguns são mais fáceis de manter saudáveis que outros. Geralmente as de desenvolvimento mais fáceis são as mencionadas freqüentemente como material para serem usados dentro de casa em livros de bonsai e revistas.
Algumas espécies favoritas com as quais me senti recompensado foram: formas anãs de buxinho (spp de Buxus); tipos pequeno-copados de cotoneaster (spp de Cotoneaster); figos (spp de Ficus) e especialmente (pumila de Ficus); murta grega (communis de Myrtus), especialmente a forma anã (communis de Myrtus ' Compacta'); (spp de Pyracantha.), especialmente a variedade anã ' Teton '; azaléias (spp de Rhododendron); sweetplums chinês (theezans de Sageretia) e serissas (spp de Serissa), especialmente alguns dos clones de neve-rosa.
Agora, vejamos o quê fazer com as sempre verdes de agulha sob luz fluorescente? Eu ouvi novamente e mais de uma vez que juníperos (spp de Juniperus.) não crescem em lugar fechado por qualquer período mais longo de tempo. Mesmo jurando que meus dois juníperus estão, respectivamente a 19 e 21 anos dentro de casa, pessoas que leram este artigo dizem que isto não é possível. Admito que o crescimento dos juníperos debaixo de luz fluorescente é muito mais lento mas, eles sobrevivem e são saudáveis.
Estou convencido que a maioria das pessoas, tentando ser agradável às suas árvores molham demais os juníperos em lugar fechado. Deixe a terra secar definitivamente entre as regas. Incidentemente, buxinhos, cotoneasters e serissas respondem bem também a este tratamento; a maioria das azaléias também em minha experiência.
Outras sempre-vivas de agulha que ficaram bem em lugar fechado com luz fluorescente são verdadeiros ciprestes (spp de Cupressus.), falsos ciprestes (spp de Chamaecyparis), e surpreendentemente, a pequena pedra preciosa o abeto vermelho de Noruega (abies de Picea ' Pequeno Gem'). Agora, alguns tipos em lugar fechado viveram um período mas foram gradualmente perdendo forma parecendo precisar de um período de dormência, isto deve ser notado aqui também. Elas são anseia (spp de Pinus), maples (spp de Acer), marmelo (spp de Chaenomeles) e spirea (spp de Spiraea). Eu sugiro que você faz um esforço para adquirir alguns dos tipos de árvores que eu especialmente desfrutei, mas seja aventureiro e também experimente. Quanto mais espécies que você tentar, mais você se divertirá, e no final das contas você terá mais bonsai também.
OUTROS ASSUNTOS.
Com que freqüência replanto meus bonsai em recinto fechado? Eu deixei algumas árvores por seis anos para reenvasar e algumas delas morreram. Minha meta agora é replantar em dois ou, no máximo, ciclo de três anos porque parece melhor para o bonsai.
Lembre-se, físicos nos falam que o oxigênio se difunde 10,000 vezes mais rapidamente por ar que por água! Portanto a areação correta no vaso é uma maneira de preservar sua árvore.
Se você é um novato e leu este longo artigo sem se intimidar, termine este artigo e vá adquirir algumas plantas - mais que algumas - você não terá muito investimento, nem monetário e nem emocional; comece sua própria experiência para descobrir o que manterá seu bonsai vivo. Oh! sim. Se você realmente quiser cultivar bonsai debaixo de luz fluorescente ou de qualquer outro modo, não se renda muito facilmente!
*Este texto é uma atualização do Jack’s "Growing Fluorescent Light Bonsai as Winter Therapy" artigo publicado na: International Bonsai, Edição No. 4, 1996; e na Bonsai [Britânica], Edição No. 34, Verão de 1997

 Informativo sobre os bonsaístas
 reconhecidos no Brasil
Copright 2018/2019 - Atelier do Bonsai - Mário A G Leal
Powered By